
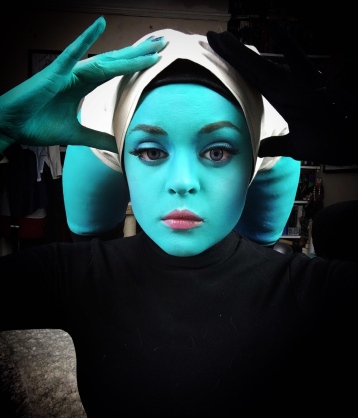
I made my lekku myself for both my Hera and my Numa cosplays. In part it was to challenge myself and see if this was something that I could do, but also in Rebels both twi’lek women have very individual lekku shapes that are crucial to their silhouettes. Shapes that are entirely different to everything seen before and not currently produced by any lekku makers out there.
 I’ve had a lot of questions about how I made my lekku. This is my step-step process.
Needed:
A headform
CardExpanding foam
Plasteline/Wax clay
Liquid latex
Talcum powder
Rice
Polyballs
Wadding
Body paint
My original Hera lekku form was made in 2015, essentially macguyvered out of what I had lying around (modelling wire, newspaper, air-drying clay) as it was more of an experiment than a set plan to create costume (as evidenced by that fact that I didn’t go on to make Hera until 2017.) I’ve since refined the process to smoother, more considered and easier to control.
First I marked out on a padded headform where the lekku would sit on my head with an estimated root radius. With my approach to the lekku and caps – the lekku are separate pieces that are slotted into and held in place by the base cap – this was absolutely necessary, but if you want to have them as a single full connected pieced that goes over the head, it is vital.
Using cardstock I roughed out the lekku shape, making a card cross-section core/guide. Numa’s lekku are pretty long and relatively straight in comparison to Hera’s.
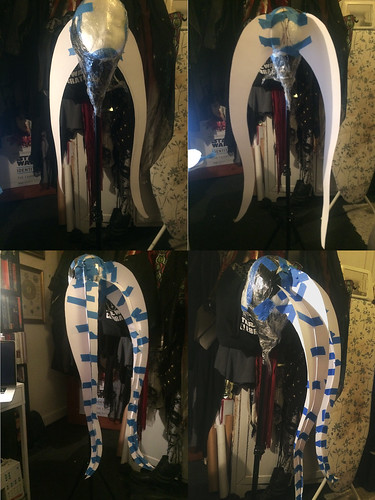 The card cross-section was then coated in expanding foam. Once set, this was then carved down to shape using the card as a guideline. I recommend carving down so that the shape is smaller than your cardframe and intended final final sculpt as the next step will be building back over this. Once you’re happy with the shape, give the entire piece a rough sanding to smooth out any bumps.
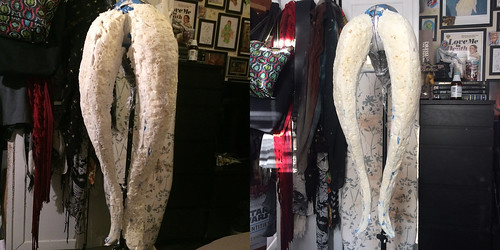
Next the form was covered in plasteline. Using a wax, non-drying clay is crucial both for ease of mind and simplicity whilst sculpting, and because it works most effectively with the latex and does not stick. I recommend using a soft quality otherwise you’ll lose time and sanity working the clay soft enough. I then went back in a smoothed it out, building up and expanding any shapes that I thought need, cutting down and reworking any others. You can use heat, vaseline and oil to help get it at smooth as possible. If you want you can then experiment with stippling to create a skin-like effect.
In my case – as I mentioned before – the separate lekku themselves are all that I needed rather than the full headpiece so I didn’t bother expanding across the crown beyond the root. If you want to make the full headpiece, make sure to cover the fell head, extending below the brow and nape lines.
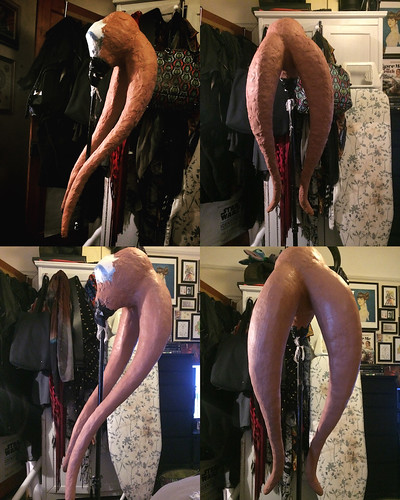
Once happy with your sculpt, coat the entire form in liquid latex. For the first layer I like to gently sponge the latex on to make sure that I don’t impact the sculpt with my application. For subsequent layers I use large, cheap paint brushes that can be thrown away once they’re too clumped with latex, powdering with talcum powder between layers to strengthen the latex.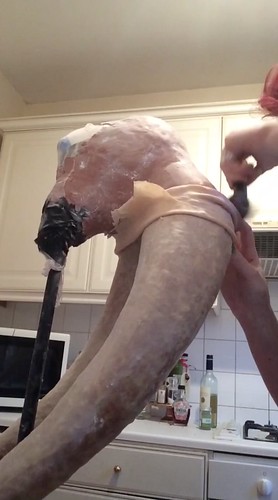
I do anywhere between 10 and 20 layers of latex – check the thickness at an edge as you progress. remember that if it is too thin, you run the risk of them tearing. Too thick, then you will end up with a very heavy, headache-inducing piece. For a pair of latex I typically go through around a litre of latex.
Once you have done enough layers of latex, dust the entire latex down with talcum powder once more and begin to slowly peel the latex off the form, dusting with more talcum powder as you go.
To fill the lekku: An inch of rice in the very tips to provide and natural weight, polyballs to the widest point of the top curve, wadding to the root and expanding foam at the very root to proved a solid, supportive base. This can then be carved to match the curve of your skull. This allows the lekku to hold their shape very well but still allow for a natural of movement as you walk.
To paint, use the same body-paint that you will use for your skin tone, sealing and powdering thoroughly between each layer. To finish off spray with 2 to three layers of setting spray. Another option is to coat the entire piece with clear plasti-cote or similar.


Love it!
LikeLike
What kind of liquid latex did you use? Brand?
LikeLike